YABATBRH (Yet Another Beauty and the Beast Rose Hack)
In a previous episode, the base from a World of Color Sipper Cup was paired up with a castle light-up ornament, a glass candle holder and a dome from a plastic drink bottle to give a Made With Magic enabled, elevated display case. It was surprisingly simple and cheap to make and turned out to be more attractive than I'd imagined. Love it when it happens like that.
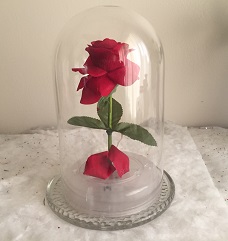
Now that we've sailed past Christmas and are heading into Valentine's Day, and with the new Beauty and the Beast movie opening in the not too distant future, let's adapt that previous hack and make a red rose the new center of attraction.
I know, I know. This has been done to death, but I don't recall seeing one with a Made With Magic spin. If you happen to be lucky enough to have scored a World of Color Sipper Cup, then this is a fairly simple hack that will simultaneously answer the question of what in the world can one do with such a thing, while delighting any Beauty and the Beast fans that may be lurking in your household.
Out with the old dome and in with the new
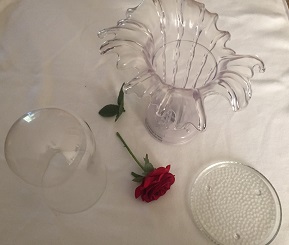 The first thing that needed changing was the 'dome'. That metal ornament hanger inserted into the top of the dome in the previous project won't work here. And replacing it with something else won't work, either, as anything placed on top of the dome will only obstruct the view of the rose. Don't want that.
The base of the WOC sipper is 4.5" across. A dome with an inner diameter of 4.5"+ is required, and the preference would be for a plastic dome, as I can easy imagine this hack might be something that could end up in a kid's room. A 7.5" tall plastic dome that seemed to meet the specs was purchased, along with a 8" tall glass dome to serve as a backup in case the plastic one didn't work out. That turned out to be a good call.
Now, for the rose
Since the lighting will all come up from the base, the rose will need to be a nice red one that responds in an appealing manner to that up lighting. If the plan is to remove a couple of the petals and scatter them at the base, the petals will have to be able to sell the effect in a reasonably convincing manner. Some of the flimsier fabric flower petals are too thin and let too much light pass through them to sell the effect. I went with this one and am very happy with how it worked out.
Bottom platform
 The bottom platform is a 6" glass candle holder from Dollar Tree. Both of the domes purchased came with some form of base. However, the plastic dome was ruled out for this hack at an early stage as the WOC unit didn't fit inside that dome. While the specs say it's a 4.5" diameter, that isn't the inner diameter measurement. Actually, the outside diameter is a tad under that value, too. The glass dome does give an honest 4.5" i.d. and came with a wooden base that could have been used. To go that route would have required cutting a notch in the wood to provide access to sneak the power wires through. Didn't really want to do that. The WOC base already has velcro strips on the bottom that are leftover from the lantern projects. Those raise the base up high enough to wiggle some wires underneath when it's set on top of a support. I had the candle holder left over from Christmas decorations so I went with that. Took the easy way out. Looks nice, though.
Cut the stem to length and drill a hole in the top of the WOC base to support the rose
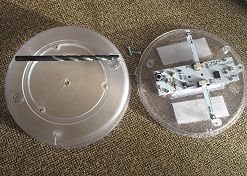
A hole in the top of the base unit's dome is going to be what holds the rose upright in a standing position. If you look carefully at the PCB for the actual Made With Magic components, you'll notice that there aren't any chips or other electronic gizmos in the dead center of it. Should be safe to let the end of the rose's stem rest there. Doesn't mean you want to risk cutting into it with a drill bit!!!!
Disassemble the base unit so you have the dome part free and clear. Now figure out how tall you want your rose to be inside the dome and cut the stem. Carefully match your drill bit size to the size of your cut rose stem. The fit has to be snug if you hope to have the rose stand upright. In my case, a 5/32" bit was the right size. Drill and test. If the hole came out a little too big, you're gonna have to use some hot glue later on. Now put the assembly back together and go on to the next step.
Wire up for power
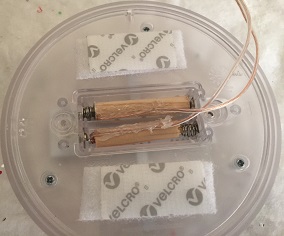 The last thing you're gonna want to do, after getting everything just right, is to go and take it all apart just to change the batteries and/or pick the whole thing up to get to the switch on the bottom to turn it on or off. Nope. If this is the final resting stop for your WOC base, soldering the wires is the way to go. I rarely leave well enough alone so the picture shows some home-made dummy batteries. The positive/negative battery terminals are located on the end closest to the switch.
What you connect those wires to in order to power your creation depends upon your intended use. Options were discussed in the article on powering MWM devices. An external battery holder for 3 AA rechargeable batteries with an on/off switch wouldn't be a bad idea.
Trim some petals, add any desired leaves, insert the rose in the base and put it all together
 When putting it all together, there are a few things to be mindful of. You'll want the infra red receiver (see pic on the left) to be facing in the direction that MWM codes are likely to come from, usually in front and facing out into the room. The wires you'll want going out the back.
Cutting a couple of petals out helps sell the motif and also comes in handy to cover up any glue that needed to be applied to hold the rose in place. Just don't cover any of the base LEDs with your fallen petals. Similarly, distressing the petals a bit by pulling them outwards helps catch the uplighting and is consistent with the theme.
If leaves are to be added, try to arrange them such that they don't block the uplighting from reaching the distressed rose petals.
Lighting the results
The stored effects that run when the device is in demo mode don't show off this item at it's best. The 48 17 effect is particularly annoying.
It's at it's best when an external controller is used to set the lighting effects. After some experimentation, I found I prefer simple, solid color. At dawn and dusk, solid white at 80% intensity looks nice (67 D0 32 66 D0 05 FF). When it gets completely dark, 0E 0F D0 32 66 D0 05 FF is preferred. When a more dynamic look is desired, 24 0E 0F 0E 8F 58 F0 48 04 D0 42 10 D0 05 FF works for me.
