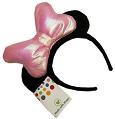
The Minnie Mouse headband was among the group of new Made With Magic devices that were released in October of 2014. From time spent in the parks, it seems to be one of the more popular MWM items. However, despite it's relative popularity, I don't recall seeing a previous online tear down posted for this device. Nor does it seem to be much favored by MWM hackers. Maybe that will change as folks get to know it a little better.
Design
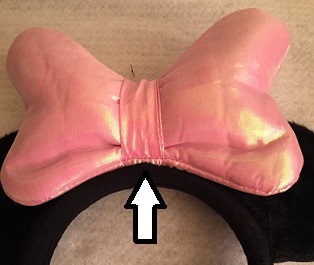
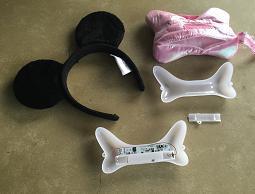
To get to the on/off switch, which is also the way to access the battery compartment, requires lifting the velcro flap on the backside. You'll probably have to take the headband off to turn it off and on. The opening isn't that large. Access to the battery compartment is a bit awkward.
In use, the pink fabric often alters the apparent colors emitted by the LEDs. That can make it more difficult to decipher the effects of the various MWM codes.
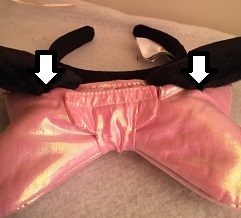
The "bow" item is sewn onto the headband at the three connection points indicated by the arrows in the images to the right. Carefully snipping those threads allows the bow to come free. There doesn't appear to be a non-destructive way to release the inner MWM components from within the bow material. But once the seam was opened, the white plastic piece simply wiggled out. Getting that plastic container open just requires a screw driver.
Putting it all back together shouldn't be that hard, but would require re-sewing the seam that was opened and then sewing the bow back onto the headband.
Materials
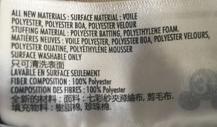 The materials listed are:
Surface material - Voile polyester, Polyester boa, Polyester velour
Stuffing material - Polyester batting, Polyethylene foam
So any paints, adhesives and/or heat treatments that are consistent with those materials should be fair game for personalizing this item.
Electronics
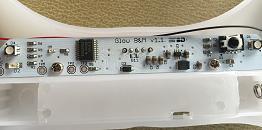
The PCB in the Headband is a single 3.5" x 7/16" board containing both of the RGB LEDs. The spacing between the LEDs, from center to center is about 3". The battery compartment is directly below the PCB mounting points. To release the PCB from the plastic casing just requires a screwdriver. To loosen it from the battery compartment you'll have to snip the wires. On the backside of the PCB are the connections for the battery wires, the on/off switch and the serial number.
Click the image above for an enlarged version of the frontside components.
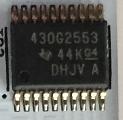
The processor used to control this device is the same one that is used in most of the MWM devices: TI 430G2553.
This device might be the most infrared-challenging of the entire MWM series of devices. The IR signals not only have to pass through the pink fabric layer, they also need to penetrate the white plastic inner shell. And, unlike the Ear Hat which orients the IR receiver facing upwards so it may receive equally well from front or back, the Headband orients the IR receiver facing forward in the front. The PCB probably blocks IR signals coming from the rear. Despite such challenges, it manages to perform pretty well. Knowing what these MWM IR signals can and can not negotiate is important information for MWM hackers to keep in mind when designing new creations. Apparently, they're pretty hardy little signals!
Powering
It's designed to be powered by 2 AAA batteries in series - or about 3V. The device in this report has what appears to be the same boost regulator that was found in the Ear Hat and it was verified that it can run off a single 1.5V battery if connected across the power attachment points.
With batteries supplying 3V, steady white (93 67 D0 05 FF 3C) current draw ~ 220mA. No LED output (90 60 A6) ~ 3mA current draw.
Stored codes
These are the emitted codes sent from the device when powered on in standalone mode, ie receiving no external signals:
99 42 CD AB 48 00 0C ?? D0 0E 80 CK
99 42 CD AB 48 00 0C ?? D0 0E 83 CK
99 42 CD AB 48 14 0C ?? D0 0E 83 CK
99 42 CD AB 48 15 0C ?? D0 0E 80 CK
99 42 CD AB 48 16 0C ?? D0 0E 80 CK
99 42 CD AB 48 18 0C ?? D0 0E 94 CK
99 42 CD AB 48 18 0C ?? D0 0E 95 CK
99 42 CD AB 48 88 0C ?? D0 0E 80 CK
Hacks
Purchasing options
- In the Parks! - This is the most fun option. If you have an Annual Pass, try to buy one inside a store instead of the kiosk to get a Passholder's discount.
- From the Disney Store - You don't really need to be in a park to get one of these if you want one.
- Shop Parks App - You may find more products offered through the app than are advertised in the Store

