
This member of the Made With Magic (MWM) family was introduced in the US in October of 2014, but was reported to be available at the Hong Kong park as early as September of that same year.
The first difference from some of the other MWM items is that this one comes tucked away in a bag. It can't be explored nor tried on until one takes a leap of faith and purchases it.
Well, that's not entirely true. If you know how to go about it, you can feel your way through the bag to the inside of the cuff and switch the device on without opening the bag. It's probably a good idea to just that before buying one to make sure the battery hasn't been run down and to check the alignment of the MWM components. Alignment of the LED strip in the palm is sometimes pretty cockeyed and the light pipes extending into the fingers may or may not light up as you'd expect they should. We'll go into all that shortly.
Getting it turned on
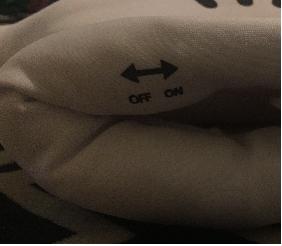 The first adventure with this item was figuring out how to turn it on! The picture to the left illustrates the dilemma. Looks like they forgot to add the switch! Not really. Nothing explains the situation but poking around discovered a switch beneath the fabric - although it is surprisingly difficult to locate and manipulate. At least in my experience.
Now, to try it on. Only made it in, easily, up to the middle of my palm. With a lot more effort, I squeezed my hand all the way in. I wouldn't want to spend much of the evening wearing this. Clearly, it's designed for customers with smaller hands. Glad I intended to take it apart, instead.
Changing the Batteries
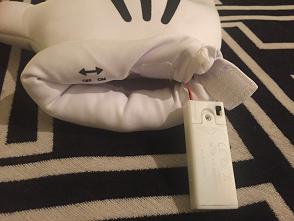 With the switch buried beneath the fabric, how does one change the batteries when they run down? On the other end of the cuff there's a flap secured with velcro. Undoing the velcro gives access to the opening to coax the battery holder out of the cuff. It was a very tight fit! Probably don't really need the velcro to hold that in. Very tight fit. What comes out is simply the battery holder and that pesky on/off switch. Runs on two AAA batteries.
Accessing the MWM components
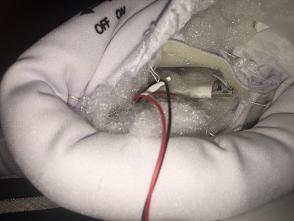
Using my Swiss Army 'seam ripper', I began exploring upstream of those wires connected to the battery compartment. They lead to the main circuit board buried amidst the stuffing in the palm. It resists coming out easily. As was discovered, there are a couple impediments for easy removal. First, each of the four LEDs have light pipes attached to them, running up into each of the four fingers. These are why you see the light in the palm area AND up into the fingers. How well you see the output from the light pipes depends upon how they got inserted into the fingers. There seems to be a lot of variation. That's why I suggest testing before buying - unless you simply intend to extract the moving parts.
Second, the infrared receiver is sewn into the garmet tag on the side of the device and connected by three wires to the circuit board in the palm. It's intended to stay put. You can't just pull it out. Extracting the receiver is what needs to be done first. Once that's done, the light pipes will slide out of the fingers when the main board is pulled out.
Extracting the Infrared receiver board
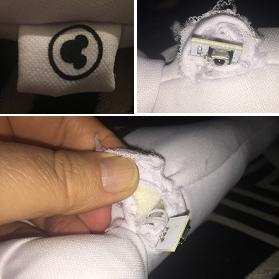 This may be the most delicate portion of the extraction. As mentioned, the receiver is sewn into the tag on the side of the glove. It needs to be extracted without messing up the connecting wires. Find that tag. Feel it to get an idea of where the board is located. Carefully cut the outer edge furthest from the seam. Peal the tag back to reveal the board and orient yourself where the wires are connected. Slowly cut the seam open until the opening is wide enough to push the board through.
Remove the MWM components
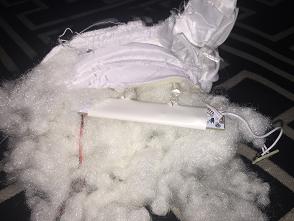
Use a finger to push the receiver board through the opening and as far into the stuffing and towards the main board as possible. Now roll back the glove and stuffing until the main board is mostly exposed. Now you can grab the main board and slowly pull the light pipes out of the fingers. If you've rolled back the glove far enough, you should be able to grab the tubes, themselves and pull on them instead of straining the LED connections. If all goes well, the attached light pipes will come out without too much of a struggle and you'll be holding the whole assembly in your hot little hand.
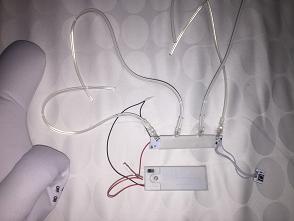
The components
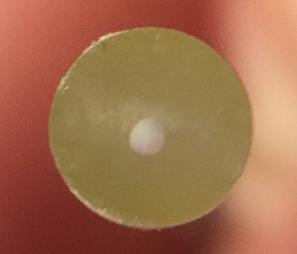
The light pipes are a new development. The LEDs appear to be 5mm RGB, through-hole components. They are inserted into one end of a short piece of tubing and then the light pipes are poked into the other end. The thin core light conducting portion of the light pipe can be seen best in the end view of the tube on the right. The tubes are flexible, but have some conformational memory. They work pretty well. These look a lot like some retired Sparkfun products. Not a lot of info about these out there.
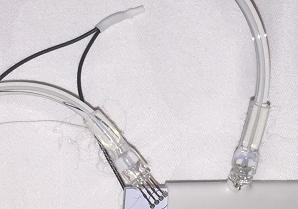
Looking at the photo above and to the left, the top of the tough, white plastic covering that surrounds most of the main board can be seen. Two of the LEDs poke poke through it. No seam is apparent. Could be shrink wrap of some sort. Carefully removing that covering exposes the main board components. For a closer look, click the image below.
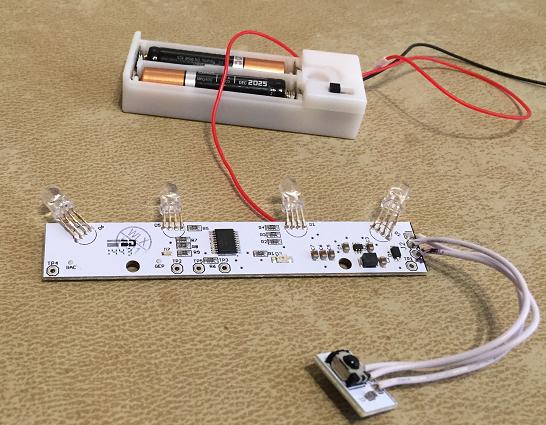
The markings on the main processor don't show in that pic but it's the same one used in most of the other MWM devices: TI MSP430G2553. There aren't any components on the backside, just soldered battery connections, a serial number and a stamp proclaiming this to be "Glow Mitt v1.2".
The wires supplying each LED control, from left to right, the: blue, green, 3V anode (+), red LEDs.
Stored codes
With the main board wrapped in a fairly thick plastic layer and then thrust amidst a bunch of stuffing that's covered with a layer fabric, I wouldn't have imagined that the device would try to emit peer-2-peer synchronization codes. But, apparently, it does:
99 42 CD AB 48 00 0C XX D0 0E 80 CK
99 42 CD AB 48 14 0C XX D0 0E 83 CK
99 42 CD AB 48 15 0C XX D0 0E 80 CK
99 42 CD AB 48 16 0C XX D0 0E 80 CK
99 42 CD AB 48 17 0C XX D0 0E 94 CK
99 42 CD AB 48 17 0C XX D0 0E 95 CK
99 42 CD AB 48 17 0C XX D0 0E 96 CK
99 42 CD AB 48 18 0C XX D0 0E 94 CK
99 42 CD AB 48 18 0C XX D0 0E 95 CK
99 42 CD AB 48 18 0C XX D0 0E 96 CK
99 42 CD AB 48 88 0C XX D0 0E 80 CK
Right-Left software response orientation
The other MWM devices containing 4 RGB LEDs mess with the MWM right and left ear command responses. With Chernabog, right-left becomes up and down, while the World of Color sipper cup gives a diagonal response. I'm glad to report that the two LEDs closest to the IR receiver (D1 & D2) respond to codes for the right ear and the other two respond as appropriate for the left ear. Nice.
Conclusion
From a hacker's perspective, there's a lot to like about this product. 4 RGB LEDs - none of which are surface mounted. The IR receiver is already on a wire for easy repositioning. Right is right and left is left. Peer-2-peer capability. There have to be some great things that can be done with those light pipes - or maybe some other sort of fiber optic stuff. Attaching tubes to through-hole LEDs is trivial. Lots of possibilities.
Hacks
- Customed Glove board
- Hidden Mickey lantern
- Paper Lanterns
- Fabric Rose Buds
- Smaller Paper Lanterns
- Valentine's Hearts
Purchasing Options
- In the Parks! - This is the most fun option. If you have an Annual Pass, try to buy one inside a store instead of the kiosk to get a Passholder's discount.
- From the Disney Store - You don't really need to be in a park to get one of these if you want one.
- Shop Parks App - You may find more products offered through the app than are advertised in the Store
